Using BuddyPress Member Types API like a Pro: Registering new Member Types
This is part two of our series Using BuddyPress Member Types API like a Pro. If you haven't read the introduction, Please do read it here.
Assumption:- I am assuming that you are familiar with either developing theme or plugin. The code in this tutorial and following tutorials can be put in your custom plugin, or bp-custom.php.
To register a new member type, we will use the function bp_register_member_type. Please note that you should register a member type on 'bp_register_member_types' action.
Before discussing more about this function, Let us see an example. In the code below, I am registering two member types 'student' and 'faculty'.
1 2 3 4 5 6 7 8 9 10 11 12 13 14 15 16 17 18 19 20 21 22 23 24 | //register member types add_action( 'bp_register_member_types', 'buddydev_register_member_types' ); function buddydev_register_member_types() { bp_register_member_type( 'student', array( 'labels' => array( 'name' => __( 'Students' ), 'singular_name' => __( 'Student' ) ), 'has_directory' => 'student',//can be given a slug that will be appended to member directory to list all users of this type ) ); bp_register_member_type( 'faculty', array( 'labels' => array( 'name' => __( 'Faculties' ), 'singular_name' => __( 'Faculty' ) ), 'has_directory' => true, ) ); } |
As soon as you put this code in your bp-custom.php or the plugin file as discussed above, the two member types will be available. You can easily verify that the member types are registered, by visiting Dashboard->Users and clicking on the Extended profile of a user. You will see a drop down list in the right side like this:-
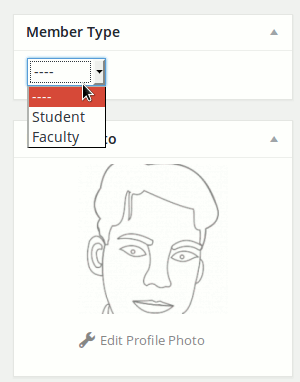
Congratulations, you just registered two new member types. You can also assign a member type to the user by selecting it and clicking Update Profile button. I just updated the member type to student. We will learn how to assign member types using code in part-3 and 4 of this tutorial.
Here is a screenshot:-
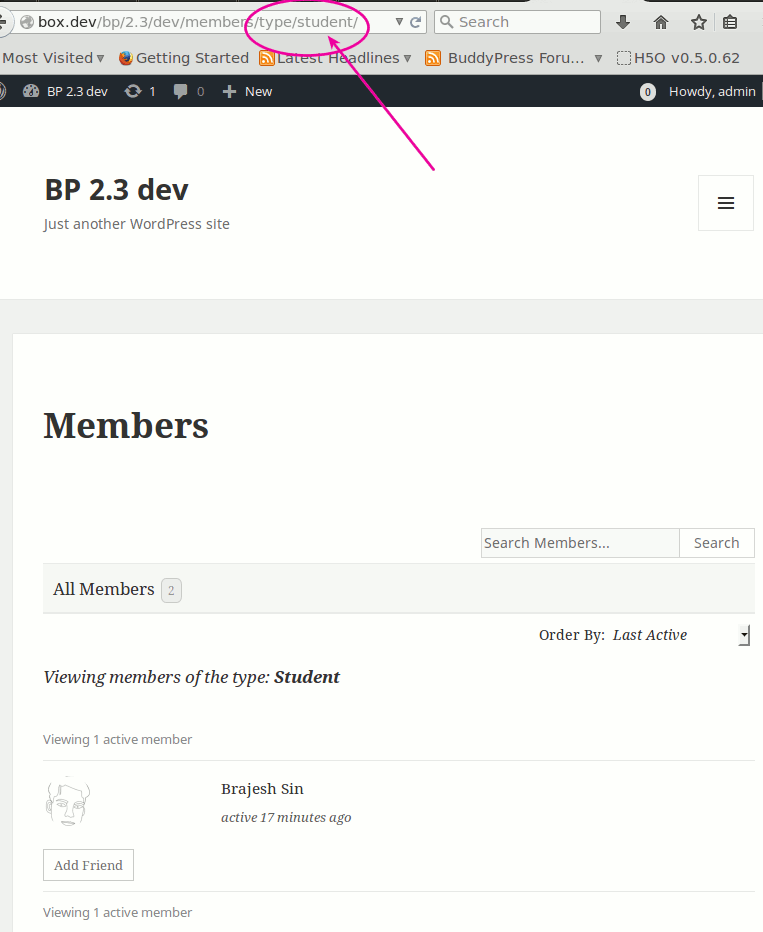
As you see, we have appended 'type' and then the actual member type. So the format is like {directory_url}/type/{$member_type}/
Now, we have already done enough work, so let us decode the function.
Usage:-
1 | bp_register_member_type( $member_type, $args ) |
Parameters:-
$member_type
- String( Required ) :- A unique key to identify the member type. It must not have spaces. Best practice is to use alphabet and lowercase, singular noun like 'student', 'staff', 'faculty', 'male', 'female', 'actor', 'director' etc
$args
- array( optional ):- An associative array of arguments. It has two allowed keys at the moment 'labels' and 'has_directory' ( has_directory was added in BuddyPress 2.3). These are explained below
- labels(optional):- An array of singular and plural string which is used at various places to provide descriptive names. Example:-
1234'labels' => array('name' => __( 'Students' ),//plural name'singular_name' => __( 'Student' )//singular name),
- has_directory( optional ) : (Added in 2.3) Boolean or String. Default is true. You can use false to disable the member type directory. You can specify a string that you can append to the directory_url/type/{$has_directory_string_name} to see the member type directory. If you don't specify it or set it to true, you can access the member type directory by visiting your member_directory_url/type/$member_type_name.
Tip:- You can always see all members of a type by appending a query string ?member_type={$member_type} in your member directory url. Example:- http://example.com/members/?member_type=student will list all students.
I hope this tutorial helps you to understand member type registration properly.
We will explore various available member type API functions and their use in our next tutorial( coming Monday ) .
This is great! Thanks a lot Brajesh!
Thank you Ben . I am glad that you liked it 🙂
Hi. thanks for this article. I tried to putt this on my bp custom but my site is a blank page when I do that.
I also tried
'Accountants',
'singular_name' => 'Accountant'
);
$types['designers'] = array(
'name' => 'Designers',
'singular_name' => 'Designer'
);
$types['sales_agents'] = array(
'name' => 'Sales Agents',
'singular_name' => 'Sales Agent'
);
if(!empty($types)){
foreach($types as $key=>$type){
bp_register_member_type( $key, array(
'labels' => array(
'name' => $type['name'],
'singular_name' => $type['singular_name'],
),
) );
}
}
}
add_action( 'bp_init', 'mpl_register_member_types');
?>
on my bp custom, and I see the Member Type on Extended Profile, but not on my register page, and directories don't work 🙁
Any Help ?
complete code :
'Accountants',
'singular_name' => 'Accountant'
);
$types['designers'] = array(
'name' => 'Designers',
'singular_name' => 'Designer'
);
$types['sales_agents'] = array(
'name' => 'Sales Agents',
'singular_name' => 'Sales Agent'
);
if(!empty($types)){
foreach($types as $key=>$type){
bp_register_member_type( $key, array(
'labels' => array(
'name' => $type['name'],
'singular_name' => $type['singular_name'],
),
) );
}
}
}
add_action( 'bp_init', 'mpl_register_member_types');
?>
Hi Vincent,
Please make sure you pass the parameter 'has_directory' => true to enable the directory.
Also, you will note in my post above that the directories won't work if you register on bp_init action. You should attach to bp_register_member_types action. Also, directory will only work on BuddyPress 2.3 or above.
The member type won't appear on registration page automatically, We will cover that in our 4th part(By creating a custom xprofile field ).
hi i am new to buddypress how to make this membership i dint understand where to put the code
HI Anand,
Thank you for the comment. You can put the code in your theme's functions.php or in bp-custom.php file inside the wp-content/plugins directory.
There is an easy way too.
You can use our Member type generator plugin
https://wordpress.org/plugins/bp-member-type-generator/
and
https://buddydev.com/plugins/bp-xprofile-member-type-field/
without writing any code.
Hope that helps.
regards
Brajesh